Does Heat Gun Speed Up Adhesive Cure Time Inflatable Kayak
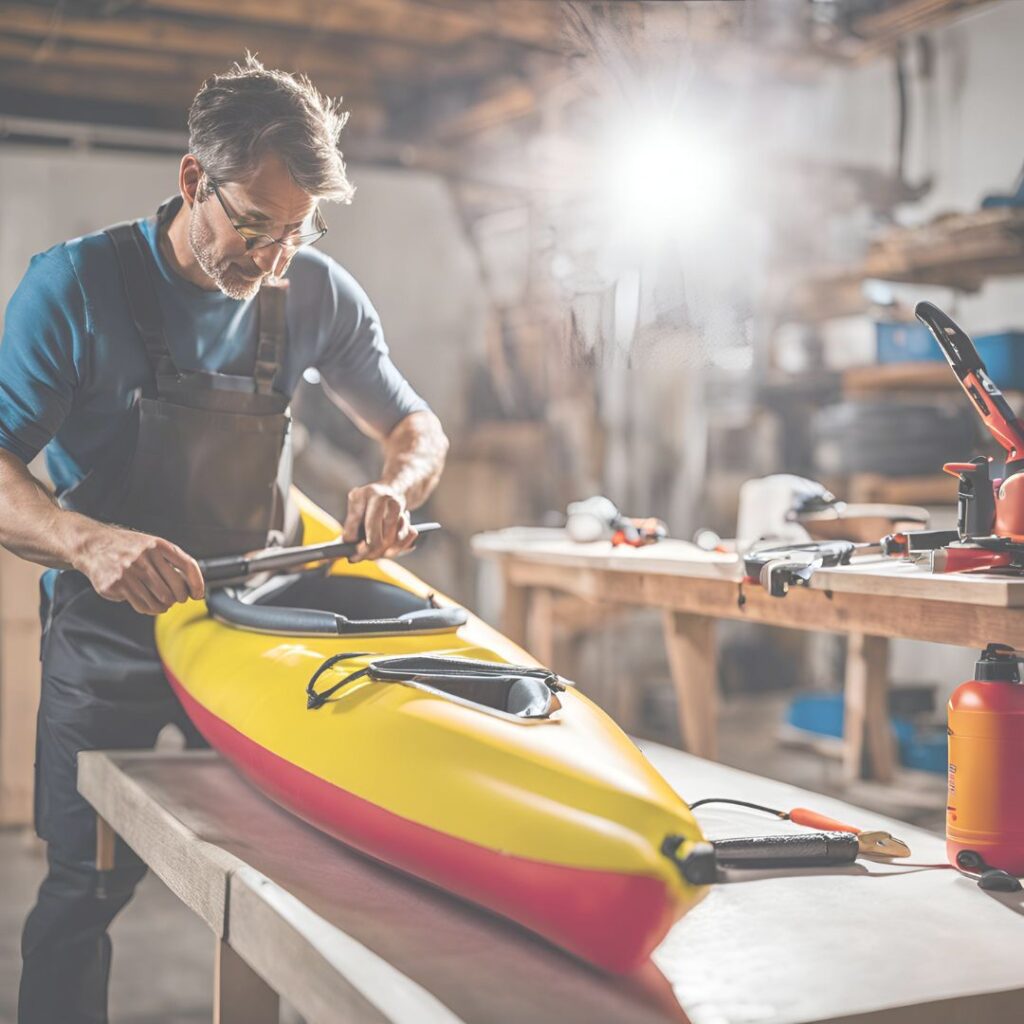
Does heat gun speed up adhesive cure time inflatable kayak repairs, or is that just wishful thinking? Imagine you’re all set for a weekend adventure, but your kayak springs a leak, and now you’re stuck waiting for adhesive to dry.
You might start thinking, “What if I just heat things up a bit?” You wouldn’t be alone in this DIY rabbit hole. Whether it’s impatience or the need to speed up your repair time, the idea of using a heat gun is appealing – but is it a good one?
Don’t worry; we’re here to separate the myth from the truth and make sure you don’t melt more than just time away. Let’s get into the nitty-gritty of whether a heat gun can really save you from a 24-hour adhesive cure wait, without burning a hole (literally) in your inflatable kayak.
Does Heat Gun Speed Up Adhesive Cure Time for an Inflatable Kayak?
So, does heat gun speed up adhesive cure time inflatable kayak repairs? Yes, a heat gun can speed up the adhesive cure time for an inflatable kayak, but it’s not as simple as blasting the heat and hoping for the best. Here’s the thing: adhesives used on inflatable kayaks – whether for patching holes or sealing seams – typically require time to bond properly.
The curing process allows the adhesive to chemically react with the kayak material, ensuring a strong, durable hold. When you’re in a rush, waiting for hours (or even a day) can feel like a lifetime. That’s when people start thinking, “Can a little heat hurry this up?”
The answer is yes, but with some caution. Applying gentle, controlled heat with a heat gun can indeed accelerate the curing process. The key is to keep the heat at a low to medium setting (somewhere around 100-150°F) and apply it evenly across the patch area.
If done correctly, this can cut the curing time down significantly – by a few hours, sometimes even more, depending on the conditions.
However, it’s a delicate balance. Too much heat, applied too closely, can do more harm than good. You risk damaging the kayak material or creating weak spots in the adhesive, which could lead to future leaks.
So, while a heat gun can speed things up, you still need to handle it with care, patience, and precision.
In short, yes, a heat gun can be a valuable tool to reduce cure time – but it’s not a miracle fix. Use it wisely, and you’ll be back on the water faster without sacrificing the quality of your repair!
RELATED: Are Inflatable Kayaks Safe
How Adhesives Work: The Science of Curing
To understand whether heat guns speed up adhesive cure time for inflatable kayaks, it’s important to know what’s happening chemically. Adhesives cure through either solvent evaporation or a chemical process that forms a solid, long-lasting bond between your kayak’s material and the patch.
For inflatable kayaks, the adhesive is often designed to work with PVC, urethane, or other similar materials.
The cure time is critical here. A proper cure ensures that the bond will hold up against water pressure and wear. While it’s tempting to rush this process with heat, doing it incorrectly could leave you with a weak bond – or worse, a damaged kayak surface.
Using Heat Guns: Speeding Up the Cure Safely
So, does heat gun speed up adhesive cure time inflatable kayak repairs? It can – but only if you use it wisely. Here’s a step-by-step guide on how to speed up the process without compromising the bond or the material of your kayak.
Step 1: Set Your Heat Gun to a Low or Medium Setting
The biggest mistake people make is thinking more heat equals faster results. Keep your heat gun at a low or medium temperature – around 100-150°F (37-65°C). Anything higher, and you risk deforming or even melting your kayak material.
Step 2: Maintain a Safe Distance
Hold the heat gun about 8-12 inches away from the patch. Moving it too close can cause hot spots, which may lead to uneven curing or damage. The key is to apply gentle, even heat across the surface.
Step 3: Keep It Moving
Don’t focus the heat on one spot for too long. Move the heat gun evenly over the entire repair area to ensure consistent curing. Keeping it moving also prevents overheating in any one section, which could weaken the adhesive.
Step 4: Be Patient (Yes, Really!)
Even though you’re speeding things up, patience is still required. You might cut curing time down by a few hours, but the adhesive still needs some time to set properly. Don’t rush to inflate the kayak right after applying heat.
Best Heat Guns for Inflatable Kayak Repairs
Ready to speed up those repairs? Here are highly-rated heat guns that can help you cut down on curing time without risking your kayak’s integrity.
1. Wagner Spraytech 0503008 HT1000
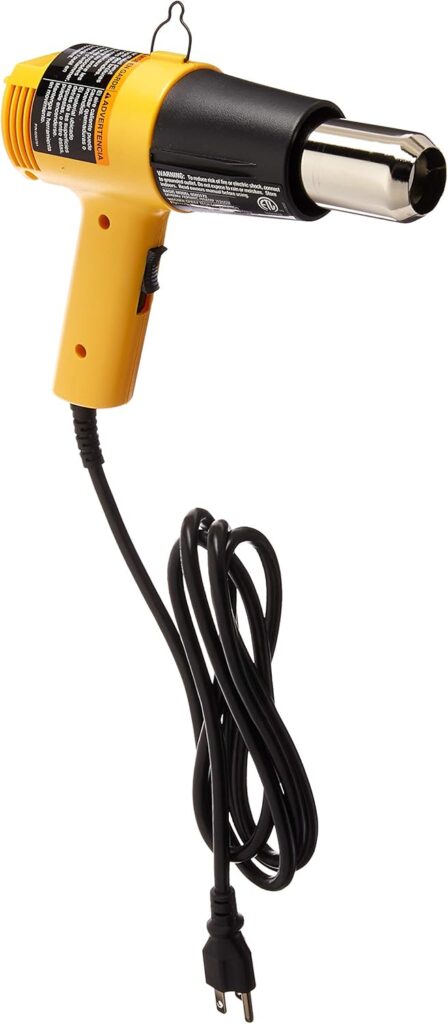
This budget-friendly heat gun offers two temperature settings (750°F and 1000°F), perfect for kayak repairs. It’s durable, easy to use, and comes with a corrosion-resistant nozzle.
- Pros: Simple, sturdy, and affordable
- Cons: Lacks finer temperature control for more delicate jobs
Features
- Dual temperature settings
- Built-in safety features
- Lightweight design
2. PORTER-CABLE Heat Gun (PC1500HG)
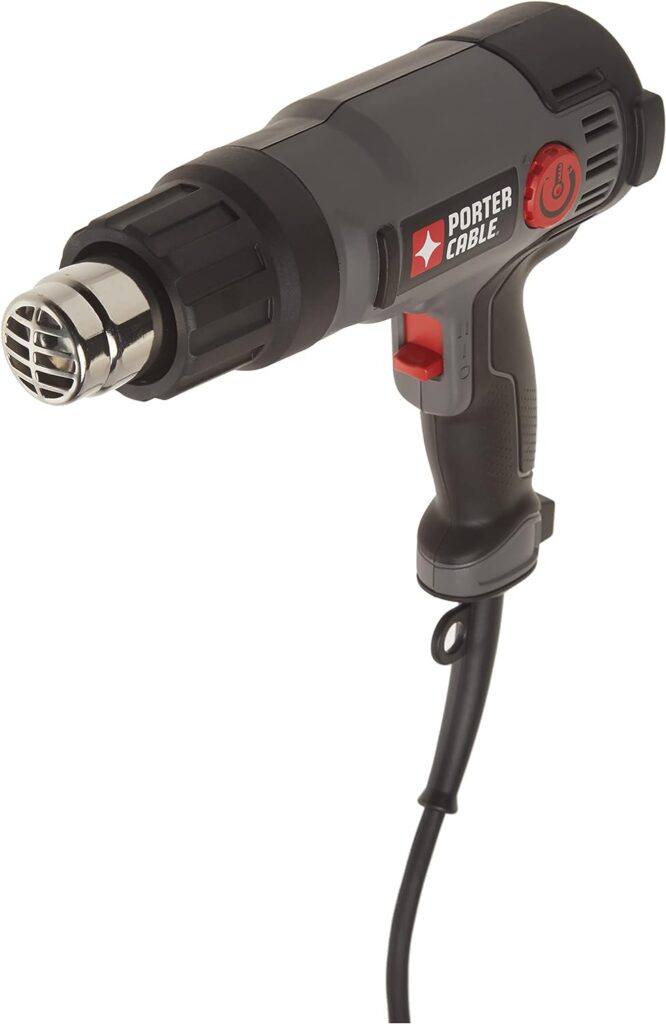
With variable temperature control from 120°F to 1150°F, the PORTER-CABLE Heat Gun is versatile enough for all kinds of repairs, including inflatable kayak patches. It also has a hands-free stand for safe operation.
- Pros: Wide temperature range, durable build
- Cons: Slightly bulkier than other models
Features
- Variable temperature control
- Hands-free operation
- Built for heavy-duty use
3. BLACK+DECKER HG1300 Dual Temperature Heat Gun

A reliable option for those on a budget, this BLACK+DECKER model has dual temperature settings (750°F and 1000°F) and a compact design. It’s great for small, quick fixes.
- Pros: Lightweight, easy to handle
- Cons: Limited temperature options
Features
- Compact and portable
- Built-in stand for hands-free use
- Ergonomic grip
4. DEWALT Heat Gun (D26960K)
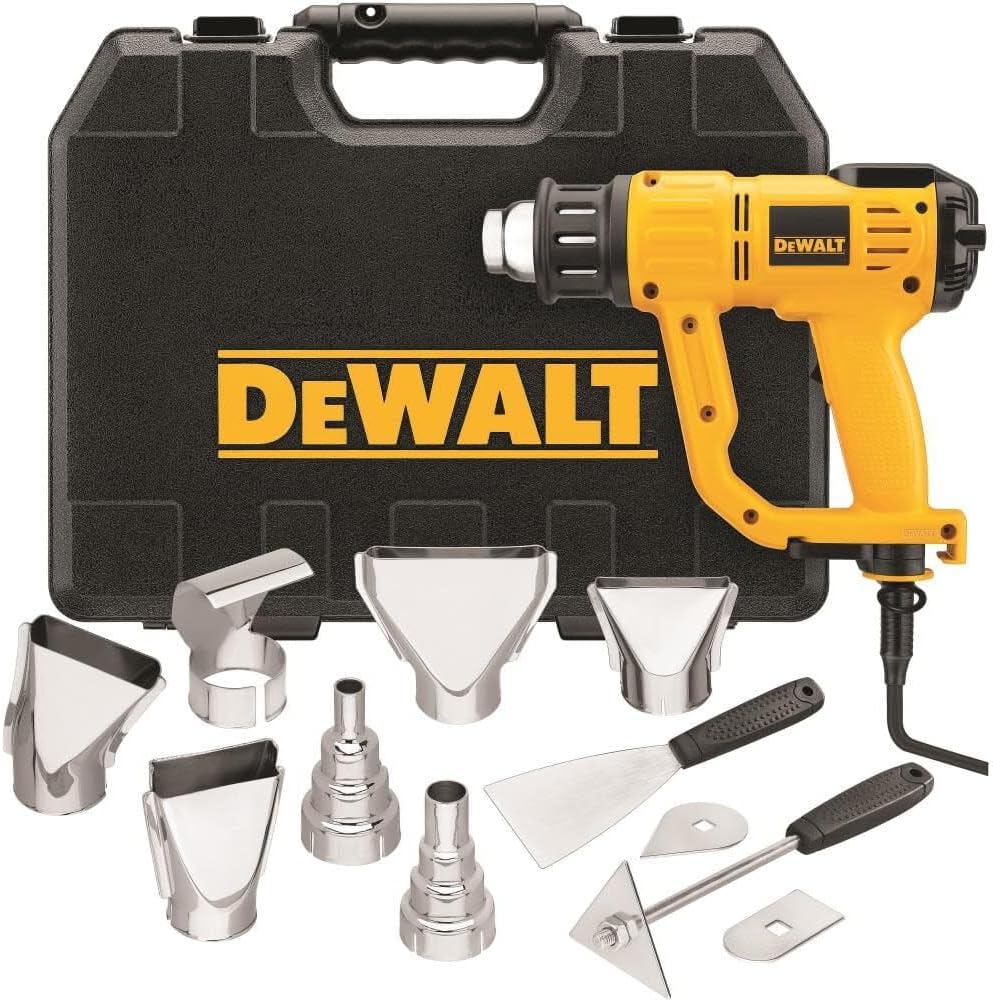
This heat gun is a powerhouse with 12 temperature settings and a digital display for precise adjustments. Ideal for more complex repairs, it’s perfect for people who want total control.
- Pros: Digital temperature control, ergonomic design
- Cons: Higher price point
Features
- Digital display for temperature settings
- Overload protection
- Multiple nozzle attachments included
5. SEEKONE Heat Gun 1800W
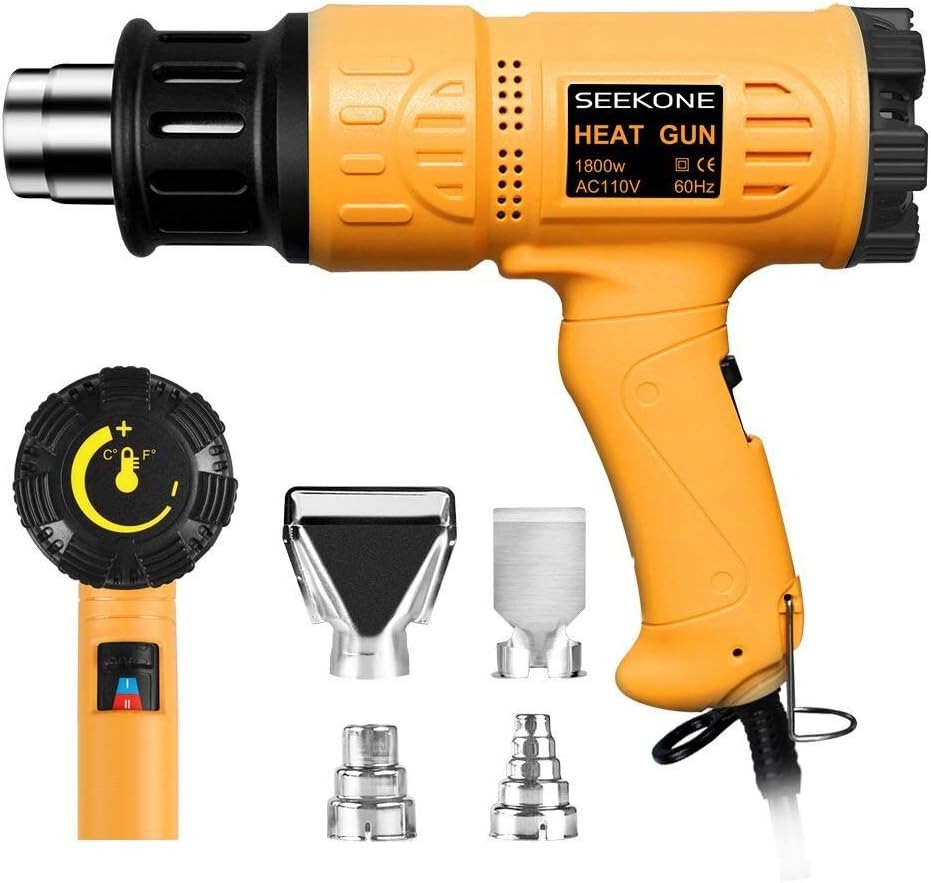
This high-performance heat gun offers adjustable temperature and a powerful motor for quick results. It’s great for those looking to cut down cure time without sacrificing quality.
- Pros: Powerful, adjustable settings
- Cons: Heavier than other models
Features
- Precise temperature and airflow control
- Includes four nozzle attachments
- Fast-heating capabilities
6. Genesis GHG1500A Dual Temperature Heat Gun
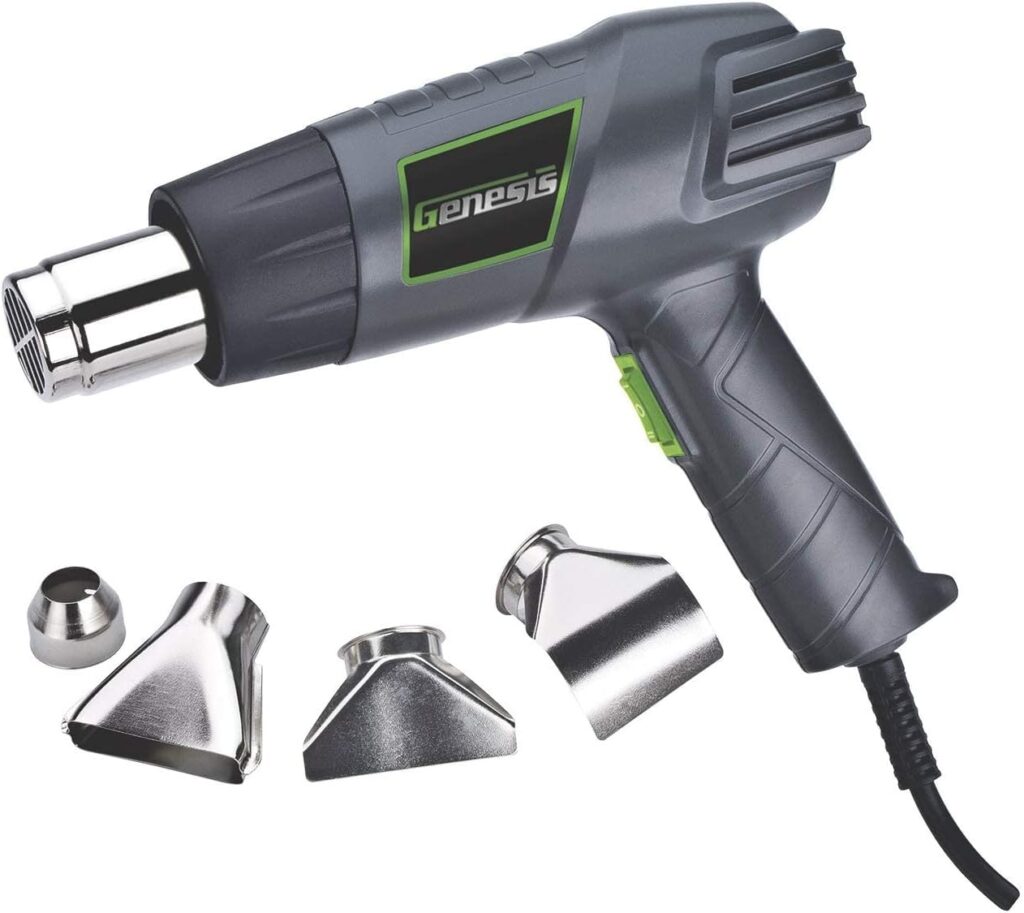
Genesis offers a compact, dual temperature heat gun that’s perfect for kayak repairs on a budget. Its small size makes it easy to transport, but it still packs enough punch for most repairs.
- Pros: Affordable, compact
- Cons: Less powerful than higher-end models
Features
- Dual temperature settings
- Lightweight and portable
- Built-in cooling feature
READ ALSO: Are Inflatable Kayaks Good For Fishing – Best Angler Kayaks
Features to Look for in the Best Heat Guns for Inflatable Kayaks
Before you go clicking “buy” on the first heat gun you see, there are a few things to consider. Not all heat guns are created equal, and for something as delicate as an inflatable kayak repair, you want to be sure you’re getting the right tool for the job. Here’s what to look for:
1. Adjustable Temperature Settings
This is non-negotiable. You want a heat gun that lets you adjust the temperature, ideally with multiple settings. Being able to dial the temperature down to a low or medium heat is crucial for preventing damage to your kayak material.
2. Airflow Control
Being able to adjust not just the heat, but the airflow, helps with controlled application. A heat gun with high airflow can help disperse heat evenly, speeding up curing without causing hot spots that could harm your kayak.
3. Portability
Look for a lightweight, easy-to-handle model. If you’re using the heat gun outdoors or away from your garage, a portable, possibly cordless model could be a game-changer.
4. Durability
Since you’re likely to use this tool for other projects, make sure it’s durable. Look for heat guns with metal nozzles and robust construction that can withstand wear and tear.
5. Safety Features
Auto shut-off functions, overheat protection, and a cool-down mode are all essential safety features. These help prevent accidents like overheating or burning through your kayak (no one wants that).
6. Attachments
Some heat guns come with nozzle attachments that allow for more precise airflow direction. These are particularly useful when you’re working on small areas or detailed repairs.
READ ALSO: Are Inflatable Kayaks Good
When NOT to Use a Heat Gun for Adhesive Cure Time
While heat guns can be useful for certain repairs, they aren’t always the best solution. Here are some cases when using a heat gun might do more harm than good:
- Thin or Delicate Material: If your inflatable kayak is made from a thinner material, using a heat gun could risk damaging it. Some kayaks are constructed with thinner layers of PVC or Hypalon that may warp or melt under heat, even at lower settings.
- Old or Worn-Out Kayaks: If your kayak is older or the material has been weakened from prolonged exposure to sun or saltwater, applying heat might cause further deterioration.
- Large Repairs: For larger repairs that involve extensive adhesive application, it’s usually better to let the adhesive cure naturally over time to ensure even bonding across the entire surface.
Common Missteps: What to Avoid
There are a few mistakes that DIY repairers tend to make when using a heat gun on their inflatable kayaks. Knowing these pitfalls ahead of time can save you from making costly mistakes:
- Overheating the Patch: One of the most common issues is applying too much heat. Excessive heat can cause the adhesive to harden too quickly, leading to a brittle bond. Worse, it can warp the patch material or the kayak’s surface.
- Impatience: Another big mistake is expecting instant results. Even with a heat gun, the adhesive still needs time to bond properly. Rushing the process can leave you with a poorly adhered patch that may not last long.
- Skipping the Testing Phase: After the adhesive has cured, many people skip the testing phase. Always test your repair by inflating the kayak and submerging the patched area in water to check for leaks before you head out on your next adventure.
Tips to Speed Up Adhesive Cure Time
If you’re looking for alternative methods to speed up curing, or if a heat gun seems too risky, here are a few other options:
1. Use a Hair Dryer
Don’t have a heat gun handy? A hair dryer can be a decent substitute. While it won’t get as hot as a heat gun, it can still provide enough warmth to speed up the curing process. Use the hair dryer on a low heat setting and keep it moving to avoid concentrated heat.
2. Low-Humidity Environments
Adhesives tend to cure faster in dry environments. If you’re working in a humid area, consider moving your kayak indoors to a low-humidity room or using a dehumidifier to speed up the curing process.
3. Invest in Fast-Cure Adhesives
Some adhesives are specifically designed to cure more quickly than standard types. These fast-cure adhesives can be more expensive, but they’re worth the investment if you frequently need quick repairs.
How to Maintain Your Inflatable Kayak to Avoid Frequent Repairs
While we’re on the subject of repairs, let’s talk about how you can extend the life of your inflatable kayak to reduce the need for constant patching. Here are a few maintenance tips to help you avoid punctures in the first place:
1. Proper Inflation
Over-inflating your kayak can put unnecessary stress on the material, increasing the likelihood of punctures. Always follow the manufacturer’s recommended PSI levels, and use a pressure gauge to ensure you’re inflating it properly.
2. Avoid Sharp Objects
Whether you’re paddling in rocky rivers or pulling your kayak up on a sandy beach, always be mindful of sharp objects that could puncture the surface. Using a protective mat when dragging your kayak on the shore can help.
3. Store It Properly
Proper storage is key to maintaining your kayak’s longevity. Store your kayak in a cool, dry place, away from direct sunlight. Sun exposure can weaken the material over time, making it more susceptible to punctures.
4. Regular Inspections
Check your kayak for small punctures or wear before and after each use. Early detection can prevent minor damage from turning into larger, more complicated repairs.
The Bottom Line on Does Heat Gun Speed Up Adhesive Cure Time Inflatable Kayak Repairs?
In short, yes, does heat gun speed up adhesive cure time inflatable kayak repairs? Absolutely, but with caution. The heat gun is a powerful tool when used correctly. It can significantly reduce your adhesive cure time, but applying too much heat can turn your kayak repair into a melted mess. The trick is to apply consistent, low heat and to follow the safety tips outlined above.
When in doubt, remember: It’s better to wait a little longer for a fully cured adhesive than to rush the job and end up with a leaky kayak halfway through your next adventure.


