How To Put On A Weight Belt Free Diving – The Complete Expert Guide
If you’ve ever wondered how to put on a weight belt free diving, you’re not alone. Every new diver faces that awkward moment: standing on the beach, wrestling with the belt like it’s a stubborn python, while your dive buddy tries not to laugh.
Relax, it’s easier than it looks, and today, you’ll learn everything you need to know without the embarrassment or the bruises.
Step-by-Step: How to Put on a Weight Belt Free Diving
Putting on your weight belt correctly can be the difference between smooth diving and rough diving. If you skip the right technique, you risk the belt sliding up your chest, tightening like a vice, or worse, sticking when you need to release it.
Here’s the correct method used by experienced freedivers and instructors:
- Stand or sit comfortably on shore so you’re stable. If wearing a wetsuit, make sure it’s on correctly first.
- Hold the belt at the buckle with your dominant hand and let the weights hang evenly on each side. The buckle stays in front for easy access.
- Place the belt low around your hips, not the waist. The hip bones stop it from riding up as you descend.
- Pull it snug but not tight enough to restrict breathing. Take a full deep breath; if your lungs feel compressed, loosen slightly.
- Check the weight distribution – front and back balanced, no side heavier than the other.
- Fasten the buckle so the release tab points outward and pull once to be sure it opens easily.
- Do a buddy check. Have your partner confirm the belt sits flat, the quick-release works, and nothing’s twisted.
- Practice the emergency drop once on land and again in shallow water before any real dive.
That’s it. You now know how to put on a weight belt free diving safely and effectively. But there’s more you should understand if you want comfort, safety, and long-term confidence underwater. Let’s break it down section by section.
Why Belt Position Matters: The Hip Rule
Most beginners make the mistake of wearing the belt at the waist because it feels natural. Big problem: the moment you descend, it slides upward toward your ribcage, crushing your diaphragm and making breathing difficult.
Experienced divers position the freediving weight belt directly over the hip bones. That low spot keeps it secure even as your wetsuit compresses at depth. Your lungs stay free to expand, and the belt doesn’t ride up toward your chest.
A simple test: before diving, bend forward, squat, and twist. If the belt stays on the hips without shifting, you’ve got it right.
How Tight is Too Tight? Comfort vs Safety
You want the diving belt with weights snug enough not to slip, yet loose enough for full belly breathing. Here’s the breathing test every instructor teaches:
- Put the belt on as described.
- Take the deepest breath you can.
- If you feel the belt stop your belly from expanding, loosen slightly.
Remember, as you descend, water pressure compresses your wetsuit and body slightly. A belt that feels perfect on the surface may become painfully tight at 20 meters.
Choosing the Right Belt Type and Weights
|
|
|
|
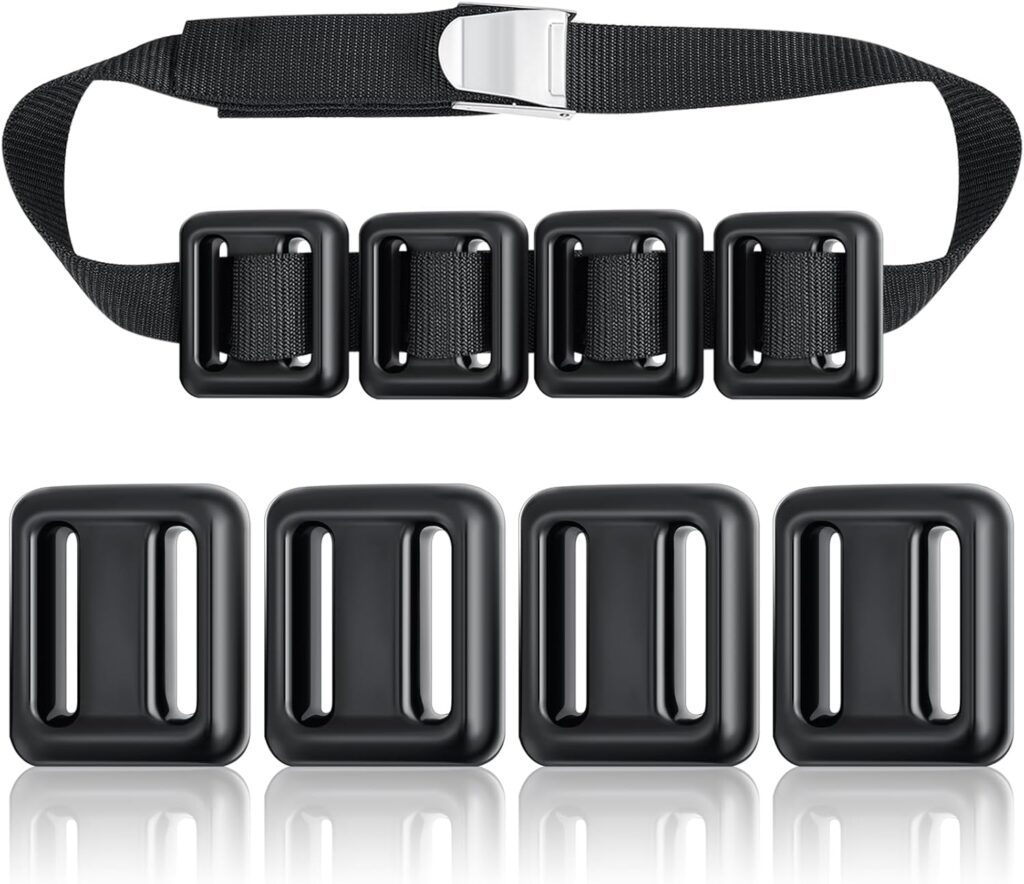
Not all belts are equal. For freediving weight belt setups, most experts recommend rubber belts with a stainless-steel quick-release buckle. Rubber grips the suit better than nylon, so it doesn’t slide when you move.
Weights come in two main styles:
- Block weights: Rectangular, slide onto the belt, easy to adjust.
- Coated weights: Quieter, less prone to corrosion, and easier on wetsuits.
For weight belt for scuba diving, you might see heavier loads because tanks affect buoyancy differently. Freediving usually uses less weight since there’s no tank to counteract.
How to Know What Diving Weight You Need Free Diving
Here’s a practical rule: At the surface with a full breath, you should float at about eye level when you stop kicking. At 10 meters, you should be neutrally buoyant—not sinking, not rising.
Factors affecting this:
- Body fat percentage (fat floats, muscle sinks)
- Wetsuit thickness (thicker suits need more weight)
- Saltwater vs freshwater (saltwater adds buoyancy)
You can calculate starting points from charts in freediving manuals, but testing in shallow water is essential.
Quick Release: Your Lifeline Underwater
The quick-release buckle isn’t optional, it’s your escape plan. Every experienced diver practices releasing the belt until it becomes automatic.
The rule:
- Buckle in front, tab facing outward.
- Nothing covers or obstructs it (no dangling straps or clips).
- You can open it instantly with one pull.
Before every dive, do a “drop test” in shallow water. It could save your life.
Fixing Common Problems: Slipping, Pain, and Snags
- Belt slips upward: Likely too high on the body or too loose. Reposition lower on the hips and tighten slightly.
- Back pain: Spread the weights evenly or switch to a weight vest if carrying heavy loads.
- Noisy belt: Coated weights or snug placement solve the clanking problem.
- Snag hazards: Keep accessories clear of the buckle; nothing should block a clean drop.

Putting the Belt on Alone vs Buddy-Assisted
Solo divers often ask how to handle the belt without help. The trick is pre-loading the belt on land:
- Lay it out straight, buckle open, weights evenly spaced.
- Step into it like a hula hoop, position on the hips, then fasten in front.
With a buddy, they can check tension, release direction, and placement before you enter the water.
Integrating with Other Gear
When adding the belt to your scuba diving gear set, remember:
- Snorkel, mask, and fins go on first.
- Weight belt next.
- Then any additional accessories like dive knives or cameras.
This order keeps the belt accessible in emergencies without entanglement.
When to Switch to a Weight Vest
If you need more weight than comfortable on a belt, or experience chronic back discomfort, consider a vest system. It distributes weight across your torso instead of the hips alone. Many deep divers use this once they exceed standard belt limits.
Maintenance Tips
- Rinse belt and weights with fresh water after every dive to prevent corrosion.
- Check the buckle spring and webbing for wear monthly.
- Store flat or hung to avoid kinks.
FAQs on How to Put on a Weight Belt Free Diving
Can I use my scuba belt for freediving?
Technically yes, but rubber freediving belts grip better and stretch slightly for comfort.
How to know what diving weight you need if changing wetsuits?
Each suit thickness changes buoyancy. Test anew whenever gear changes.
Why is quick release critical?
Because dropping weight is the fastest way to regain buoyancy if you black out or panic.
What about travel belts?
Soft weights or removable pouches make flying easier since lead is heavy.
Safety Checklist Before Every Dive
- Belt on hips, snug but not too tight.
- Quick-release tab outward, clear of obstruction.
- Weights balanced front to back.
- Breathing test passed.
- Buddy check done.
- Emergency drop practiced.
The Bottom Line on How to Put on a Weight Belt Free Diving
Learning how to put on a weight belt free diving isn’t just about strapping on lead, it’s about safety, comfort, and confidence underwater. With the right placement, weight choice, and quick-release practice, you’ll dive smoother, conserve energy, and stay safer.


